Part 2: https://itoug.it/blog/2024/12/exadata-add-oracle-home-using-oedacli-part-2
Environment:
- Exadata X9M-2
- Virtual environment with KVM
- Oracle Home in use: 19.18.0.0
- Oracle Home to install: 19.22.0.0
- Cluster version: 19.22.0.0
- OS Oracle Linux 7.9
- VM Name: ex2-itouglab01
Download latest OEDACLI:
Before adding a new Oracle home using OEDACLI you have to install the latest OEDA version.
If you don’t install on Exadata latest version of Oracle Exadata Deployment Assistant you won’t be able to setup a new oracle home because it can’t recognize an oracle version newer than the OEDACLI installed version.
Download both Linux and windows (or mac) version from the official path:
https://www.oracle.com/database/technologies/oeda-downloads.html

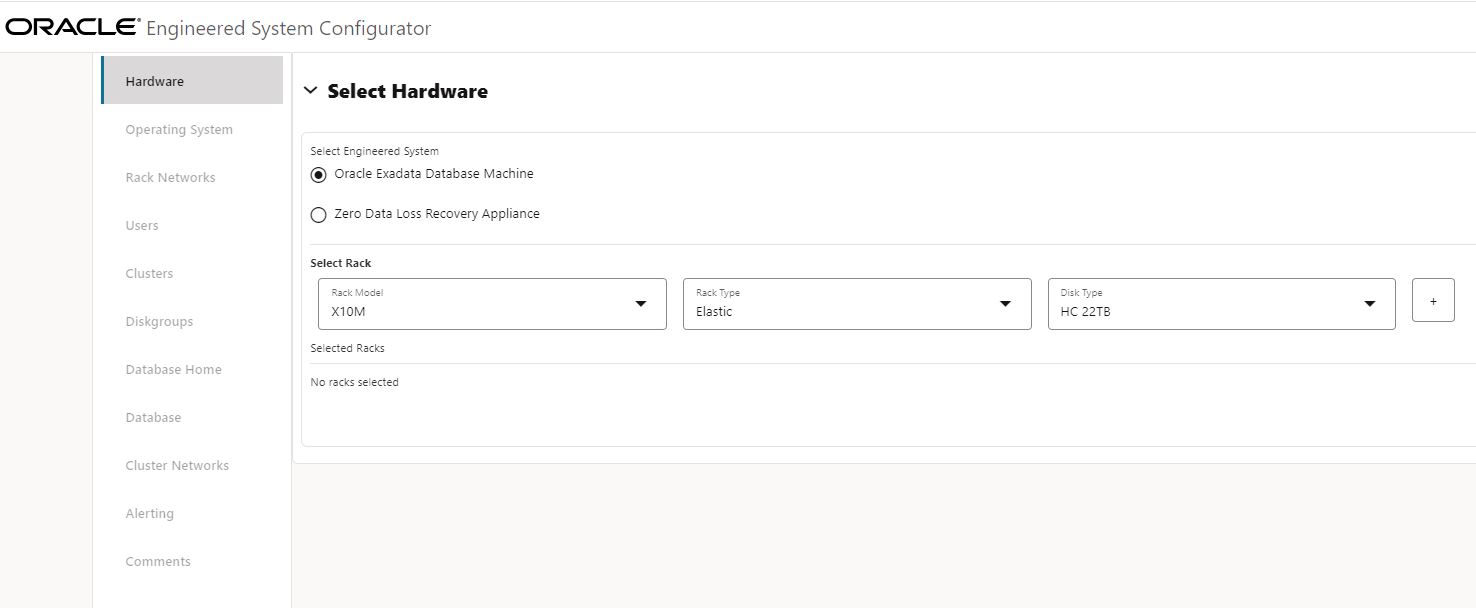
Unzip windows (or mac) OEDA file on your local computer and start file installOedaServer.cmd.
Open the web interface on the local path: http://localhost:7072/oeda/

Identify the patch image file to download:
To install the new oracle home you have to import the latest saved configuration available for the VM you want to work on.
On Exadata you can find VM configuration files on physical server node 1 in the path:
# cd /EXAVMIMAGES/onecommand
# ll Itoug-ex2-itouglab*

-rw-r--r--  1 root root    87333 Sep  5 17:18 Itoug-ex2-itouglab.xml
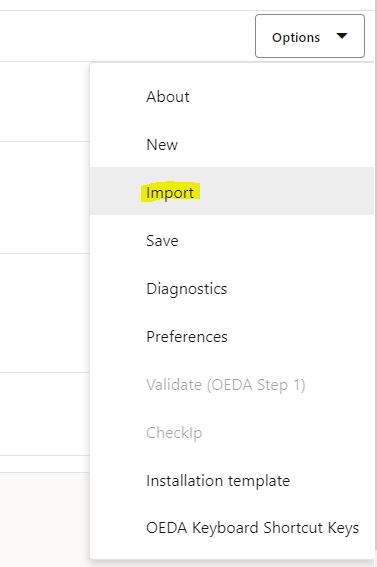
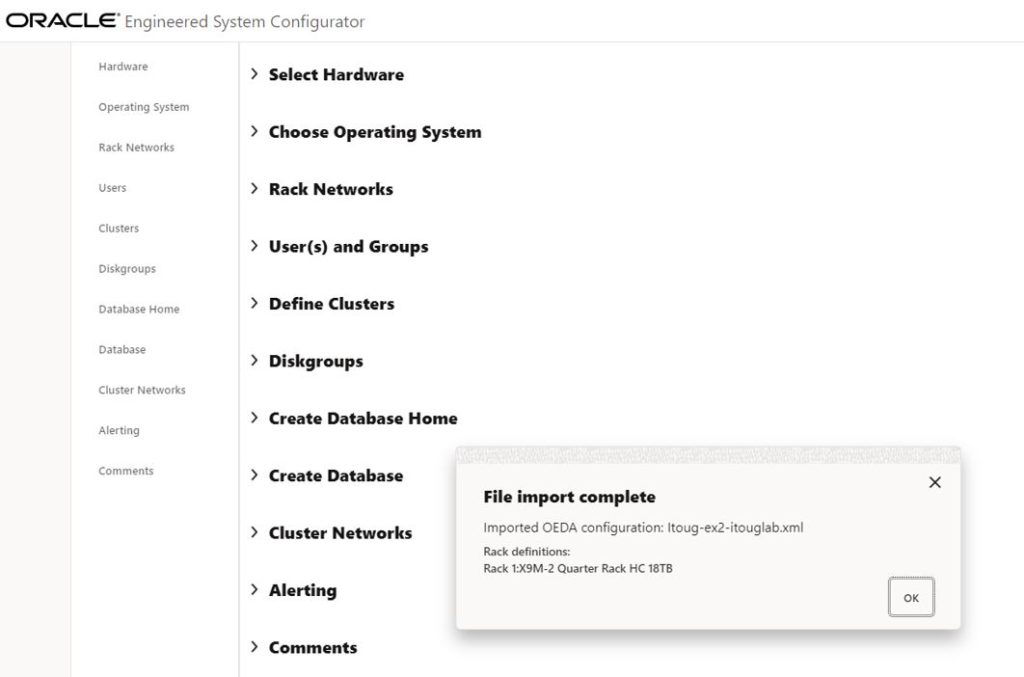
Download the configuration file locally on your PC and import it in the OEDA local web server:


Goto “Create Database Home” section:

Select the new Home version you want to install:

Apply:

Then save:

Automatically will be generated an html file with the new configuration, so open it and go to the Appendix B section:

You can find the image file name that you have to use for the new home, so go on MOS, search the image and download it:


Unzip the patch and verify in the README.txt file the version of the home image:
Build Date:     February 01, 2024 01:00

Software home of Oracle Database software
This zip file contains Database  software version: 19.22.0.0.240116
To use this patch with OEDA, copy this file to OEDA's WorkDir before running OEDA (usually node 1 /EXAVMIMAGES/onecommand/linux-x64/WorkDir).
Refer to the Exadata database machine owners guide for information about the Oracle Exadata deployment assistant
Patches installed:

[35692839;LRGRHEXAPROVCLUSTER_LIVEMIG DB_WORKLOAD ORA-02002  AND ORA-600_IPC_RECREATE_QUE_2
 35926646;OJVM RELEASE UPDATE: 19.22.0.0.240116 (35926646)
 35967489;OCW RELEASE UPDATE 19.22.0.0.0 (35967489)
 35943157;Database Release Update : 19.22.0.0.240116 (35943157)]
Update OEDACLI on Exadata:
Connect to Exadata Database Server on node 1 and go to the directory where OEDACLI binaries are installed (usually available on node 1):
# cd /EXAVMIMAGES/onecommand/linux-x64

# ls -l
total 280
-r-xr-x--- 1 root root    233 May  8  2018 applyElasticConfig.sh
-r-xr-x--- 1 root root    234 May  8  2018 changePassword.sh
drwxr-xr-x 2 root root   8192 Jul 21  2023 config
-r-xr-x--- 1 root root     97 May  8  2018 config.sh
lrwxrwxrwx 1 root root     60 Jun 13 10:39 ExadataConfigurations
-r-xr-x--- 1 root root    241 May  8  2018 genPasswordHash.sh
-r-xr-x--- 1 root root    899 May 19  2023 installOedaServer.sh
-r-xr-x--- 1 root root    312 May 20  2023 install.sh
-r-xr-x--- 1 root root     94 May 20  2023 jre
drwxr-xr-x 8 root root    126 May 30  2023 jre-oeda-11.0.19
drwxr-xr-x 2 root root   4096 Jul 21  2023 Lib
drwxrwxr-x 2 root root   8192 Jun 21 14:02 log
-r-xr-x--- 1 root root    303 May 20  2023 oedacli
drwxrwxr-x 2 root root    217 Jul 21  2023 out
drwxr-xr-x 2 root root   4096 Mar  5  2024 properties
-r-xr-x--- 1 root root 108016 Jul 21  2023 README.html
-r-xr-x--- 1 root root 101226 Jul 21  2023 README.txt
-r-xr-x--- 1 root root    259 Aug 29  2019 setuprootssh.sh
drwxrwxr-x 7 root root    150 Jul 21  2023 webApp
drwxr-xr-x 2 root root   4096 Jul 21  2023 WebLib
lrwxrwxrwx 1 root root     46 Jun 13 10:39 WorkDir
All the patches are available in the WorkDir (generated during OEDA setup on Exadata):
/EXAVMIMAGES/onecommand/linux-x64/WorkDirAs you can see there are all in use oracle home patch image files:
# ll p*Linux*.zip

-rw-r--r-- 1 root root 4976142462 Aug 24  2023 p33742177_12201220118DBJAN2022RU_Linux-x86-64.zip
-rw-r--r-- 1 root root 9092290584 Aug 25  2023 p34378299_12102220719ProactiveBP_Linux-x86-64.zip
-rw-r--r-- 1 root root 4462838301 Aug 24  2023 p34979366_1918000DBRU_Linux-x86-64.zip
-rw-r--r-- 1 root root 5431267172 Aug 24  2023 p34979367_1918000DBRU_Linux-x86-64.zip
Before to upgrade OEDACLI it is better to make some changes on directory structure to save previous configuration.
First of all create a new directory linux-x64.Conf to save first setup configuration files:
# cd /EXAVMIMAGES/onecommand
# mkdir linux-x64.Conf
Move Workdir and ExadataConfigurations directory to the new linux-x64.Conf
# cd /EXAVMIMAGES/onecommand/linux-x64
mv Workdir /EXAVMIMAGES/onecommand/linux-x64.Conf
mv ExadataConfigurations /EXAVMIMAGES/onecommand/linux-x64.Conf
Create symbolic links from Linux-x64 to new locations:
# cd /EXAVMIMAGES/onecommand/linux-x64
# ln -s /EXAVMIMAGES/onecommand/linux-x64.Conf/WorkDir
# ln -s /EXAVMIMAGES/onecommand/linux-x64.Conf/ExadataConfigurations
Check the remote server version of OEDACLI:
# cd /EXAVMIMAGES/onecommand/linux-x64
# ./oedacli --version
230721
Rename the previous version
# cd /EXAVMIMAGES/onecommand
# mv linux-x64 linux-x64.230721
Copy the downloaded OEDA Linux version zip file in a temporary directory:
scp V1041016-01-linux-x64.zip ex2dbadm01:/root/tmpUnzip the downloaded file:
# cd /root/tmp
# unzip V1041016-01-linux-x64.zip
Move the new version to the correct path:
# cd /root/tmp
# mv linux-x64 /EXAVMIMAGES/onecommand
Remove the empty Workdir
# cd /EXAVMIMAGES/onecommand/linux-x64
# ls -l WorkDir
total 0
# rm -fR WorkDir
Create symbolic links from Linux-x64 to new locations previously defined:
# cd /EXAVMIMAGES/onecommand/linux-x64
# ln -s /EXAVMIMAGES/onecommand/linux-x64.Conf/WorkDir
# ln -s /EXAVMIMAGES/onecommand/linux-x64.Conf/ExadataConfigurations
Check the version:
# cd /EXAVMIMAGES/onecommand/linux-x64
# ./oedacli --version
240212
Upload oracle home image
Next step upload the downloaded oracle home image in the work directory:
/EXAVMIMAGES/onecommand/linux-x64/WorkDirUsing your favourite scp software:

Enable SSH:
Before to start new oracle home creation it is necessary to copy in the Workdir all private keys of involved VMs and Dom0 root private key too.
The SYNTAX for rsa files is the following:
id_rsa.<hostname>.rootExample:
id_rsa.ex2-itouglab01-dbadm.root
id_rsa.ex2dbadm01.root
Define cluster version:
Before to create the new Home you have to SET the correct cluster version (that must be greater or equal to the new oracle home version) otherwise oedacli will generate errors in DEPLOY ACTIONS (of course the cluster has been already patched to the version 19.22.0.0 but the XML file loaded could not be yet updated).
STEP 1: Load XML file
# ./oedacli
oedacli> LOAD FILE NAME=/EXAVMIMAGES/onecommand/Itoug-ex2-itouglab.xml
SUCCESS - file loaded OK
Customer : Itoug – Italian Oracle User Group
STEP 2: Check cluster details
oedacli> list clusters
  version : "CloneInstall"
  clusterName : "ex2-itouglab"
  clusterOwner : "710c8ec9-4b4d-2e51-4845-ee47a2bec251"
  clusterVersion : "19.18.0.0.230117"
  clusterHome : "/u01/app/19.0.0.0/grid"
  inventoryLocation : "/u01/app/oraInventory"
  asmScopedSecurity : "true"
  clusterVips :
    clusterVip :
      vipName : "ex2-itouglab0101-vip"
      domainName : "farm.Itoug-italia.local"
      vipIpAddress : "10.20.163.133"
      machines :
        machine :
          domainGroup :
          machine :
          id : "ex2_713bcc3f-b4fa-4011-8108-98b70836a6aa_compute_Cluster-c880a8d92-2001-e9fc-6cb7-acfbc2ad79bd_vm01_id"
      id : "ex2_713bcc3f-b4fa-4011-8108-98b70836a6aa_compute_Cluster-c880a8d92-2001-e9fc-6cb7-acfbc2ad79bd_vm01_id_vip"
      vipName : "ex2-itouglab0102-vip"
      domainName : "farm.Itoug-italia.local"
      vipIpAddress : "10.20.163.134"
      machines :
        machine :
          domainGroup :
          machine :
          id : "ex2_3dec114a-9eeb-42f8-a038-b2224d00ef8d_compute_Cluster-c880a8d92-2001-e9fc-6cb7-acfbc2ad79bd_vm01_id"
      id : "ex2_3dec114a-9eeb-42f8-a038-b2224d00ef8d_compute_Cluster-c880a8d92-2001-e9fc-6cb7-acfbc2ad79bd_vm01_id_vip"
  customerName : "Itoug"
  application : "Itoug Lab"
  scanIps :
    scanIp :
  clusterScans :
    clusterScan :
      id : "Cluster-c880a8d92-2001-e9fc-6cb7-acfbc2ad79bd_id_scan_client"
  diskGroups :
    diskGroup :
      id : "508747b9-ebeb-6234-c6bb-5cf72dd67662"
      id : "ab2fc056-1a2f-49cc-e316-ecb4616707cc"
      id : "53e74c20-925b-01de-cb5f-ec619323341c"
  basedir : "/u01/app/grid"
  language : "all_langs"
  id : "Cluster-c880a8d92-2001-e9fc-6cb7-acfbc2ad79bd_id"
STEP 3: Alter the cluster version
Set the cluster to the correct version:
oedacli> ALTER CLUSTER GIVERSION='19.22.0.0.240116' where CLUSTERNAME='ex2-itouglab'STEP 4: Save and Merge the command
oedacli> SAVE ACTION
oedacli> MERGE ACTIONS
processMerge
processMergeActions
Merging Action : ALTER CLUSTER GIVERSION='19.22.0.0.240116' where CLUSTERNAME='ex2-itouglab'
Merging ALTER CLUSTER
Action Validated and Merged OK
STEP 5: Show XML actions that will be executed
oedacli> LIST XMLACTIONS
Action ID=1 merged=true deployed=true
  ID=1,CMDID=1,CMD="ALTER CLUSTER GIVERSION='19.22.0.0.240116' where CLUSTERNAME='ex2-itouglab'"
STEP 6: Deploy the change
oedacli> DEPLOY ACTIONS
Deploying Action ID : 1 ALTER CLUSTER GIVERSION='19.22.0.0.240116' where CLUSTERNAME='ex2-itouglab'
Deploying ALTER CLUSTER
Done...
Done [Elapsed = 52 mS [0.0 minutes] Wed Jun 05 08:38:47 CEST 2024]]
STEP 7: Check new cluster version
oedacli> LIST CLUSTERS
  version : "CloneInstall"
  clusterName : "ex2-itouglab01"
  clusterOwner : "710c8ec9-4b4d-2e51-4845-ee47a2bec251"
  clusterVersion : "19.22.0.0.240116"
  clusterHome : "/u01/app/19.0.0.0/grid"
  ...
  basedir : "/u01/app/grid"
  language : "all_langs"
  patches :
    patch :
  id : "Cluster-c880a8d92-2001-e9fc-6cb7-acfbc2ad79bd_id"
Now we are ready to install the new home … but this will be done in part 2 of the article.
BIBLIOGRAPHY
https://docs.oracle.com/en/engineered-systems/exadata-database-machine/dbmin/add-databasehome.html
https://docs.oracle.com/en/engineered-systems/exadata-database-machine/dbmin/alter-cluster.html
https://docs.oracle.com/en/engineered-systems/exadata-database-machine/dbmin/xmlaction.html
Oracle Linux: How to Rename Non-Root Volume Group (Doc ID 2989489.1)
How to create a new Database Home and Database using OEDACLI (Doc ID 2789297.1)


Commenti recenti